

When it comes to designing UI for Roblox, finding the right plugins can make a big difference. When you’re building a game, having an efficient plugin to streamline your design process is key. In this blog, I’ll walk you through my favourite plugin for developing UI
Why Choose the UI Tools Plugin
The UI Tools plugin by Zillibody has become my go to tool for creating beautiful user interfaces . The plugin is packed with features that allow you to easily manipulate UI elements and ensure they scale correctly across different screen sizes and devices.
when you’re designing a complex menu or a simple button, this plugin simplifies the process with easy to understand controls and powerful features that make creating a breeze.
Getting Started with UI Tools Plugin
To begin, you’ll need to install the plugin in Roblox Studio. Here’s a step-by-step guide to get you started:
- Install the Plugin:
- Open Roblox Studio.
- Navigate to the “Plugins” section and search for “UI Tools by Zillibody.”
- Click install, and once the plugin is installed, you’ll see it in your plugin menu.
- Exploring the Plugin Interface:
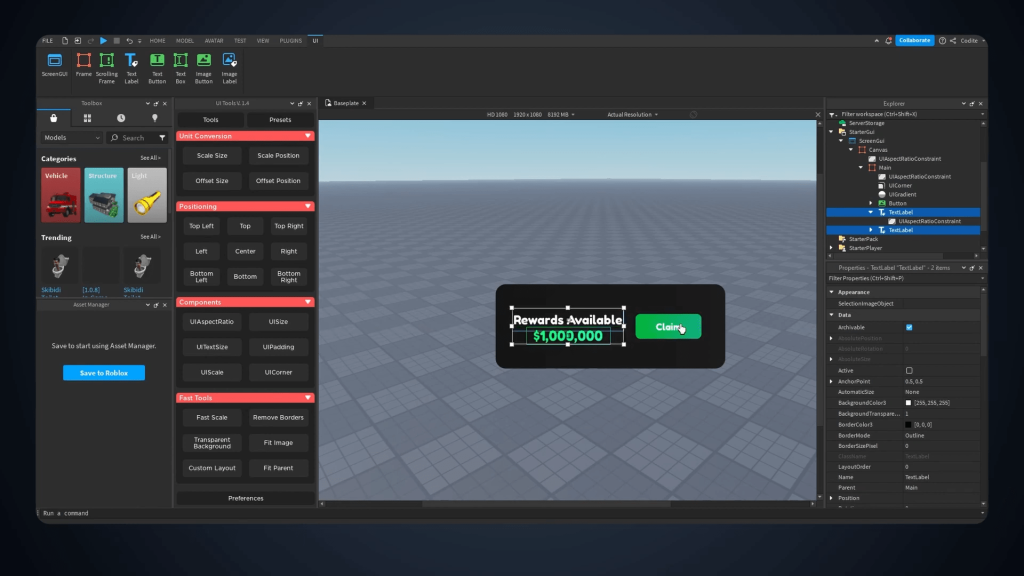
Once the plugin is installed, open it from your plugin management tab. The plugin offers a variety of tools that allow you to manipulate UI elements like text size, scaling, position, and more. Here’s a breakdown of some essential tools:- Scale & Size Controls: Adjust the position, size, and aspect ratio of UI elements.
- UI Presets: Predefined settings to quickly set up your UI components.
- Text & Size Adjustments: Easily tweak text size, font, and alignment.
Example: Creating a Simple UI in Roblox Studio
Let’s walk through an example of how to use the plugin to design a simple UI screen.
- Create a Canvas Frame:
The first step in any UI design is to create a canvas frame. This serves as the base for all other UI elements.- Add a new Frame under the “UI” category in Roblox Studio.
- Set the Anchor Point to
(0.5, 0.5)to center it. - Use the “Fit Parent” option to scale the frame to cover the entire screen. This will make your UI responsive across different devices.
- Add a Button with Custom Styling:
Next, let’s add a button to your UI. Follow these steps:- Create a new frame to serve as the button.
- Set the button’s position using the plugin’s controls for precise placement.
- Customize the button by adjusting the corner radius and adding a UI gradient to make it visually appealing.
- Add a text label to display the button’s label, such as “Claim.”
- Scale and Make the UI Responsive:
One of the key features of the UI Tools plugin is the ability to ensure your UI scales properly across different devices. This is achieved by using the “Fast Scale” and “UI Aspect Ratio” options:- Select the elements you want to scale.
- Apply the “Fast Scale” option to ensure your elements adjust automatically depending on the screen size.
- Enable the “UI Aspect Ratio” constraint to maintain proportions across different device resolutions.
Advanced UI Features with UI Tools
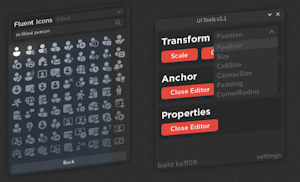
Beyond the basics, the UI Tools plugin also includes advanced features to take your UI design to the next level:
- Remove Border & Transparent Background: This allows you to remove unwanted borders and make UI elements blend seamlessly into your game.
- UI Gradient and Text Customization: Use the plugin’s options to add gradients and adjust text styles to create eye-catching designs.
- Re-Class Conversion: The plugin integrates with a tool called Re-Class, which allows you to easily convert UI elements into image buttons or other advanced UI components.
Tips for Efficient UI Design
Here are a few tips to help you work more efficiently with the UI Tools plugin:
- Organize Your UI Elements:
When building complex UIs, it’s easy to get lost in a sea of elements. Use frames, containers, and clear naming conventions to keep everything organized. - Test on Multiple Devices:
Always test your UI on different screen sizes to ensure that it looks good across all devices. The UI Tools plugin makes this easy with its fast scaling options. - Use the Tooltip Feature:
Don’t forget to hover over each tool in the plugin. A tooltip will appear with a description of what each button does, helping you navigate the features more effectively. - Iterate and Improve:
UI design is an iterative process. Start with a basic layout and keep tweaking it until you get the desired look and functionality. The UI Tools plugin makes it simple to experiment with different styles and configurations.
Conclusion
UI design in Roblox Studio doesn’t have to be complicated. With the UI Tools plugin by Zillibody, you can create beautiful and responsive interfaces quickly and easily. By following the steps in this guide and experimenting with the various features of the plugin, you’ll be able to enhance the user experience in your Roblox games and make your projects stand out.
If you’re looking to elevate your Roblox game with professional UI design, the UI Tools plugin is a must-have tool in your development arsenal. Happy designing!
How do I install the UI Tools plugin in Roblox Studio?
Simply go to the plugin tab in Roblox Studio, search for “UI Tools by Zillibody,” and click install.
Can I use this plugin for advanced UI designs?
Yes, the UI Tools plugin is suitable for both basic and advanced UI designs. It offers options for scaling, positioning, and customizing UI elements to fit any project.
Will this plugin work on mobile devices?
Yes! The plugin ensures that your UI elements will scale correctly on different devices, including mobile phones and tablets.
Can I create buttons with custom images using this plugin?
Yes, the plugin integrates with tools like Re-Class, which allows you to convert UI elements into image buttons or other advanced UI components.